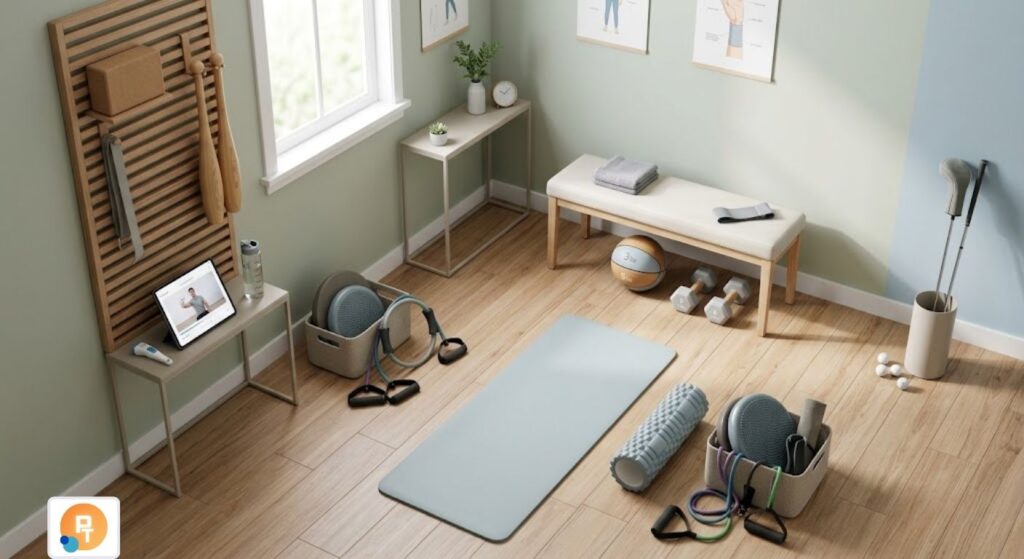
A minimalist equipment home gym setup for injury recovery does not require expensive machines or a dedicated workout room.
With resistance bands, a stable chair, an exercise mat, and a few carefully selected accessories, you can create a practical rehabilitation space for rebuilding strength, mobility, balance, and confidence.
The key is choosing equipment that matches your injury, current abilities, and physical therapist’s rehabilitation plan.
Why a Minimalist Home Gym Works for Injury Recovery
Recovery exercises rarely require the same equipment as a conventional strength-training gym.
During rehabilitation, the priority is restoring comfortable movement, improving physical capacity, and gradually preparing the injured area for everyday demands.
A small home setup makes it easier to repeat prescribed exercises consistently.
It also allows you to modify resistance, movement range, and exercise difficulty without changing machines.
A well-designed rehabilitation space should support:
- Mobility: Improving available joint movement within appropriate restrictions.
- Strength: Gradually rebuilding muscle capacity after injury or reduced activity.
- Balance: Restoring postural control and confidence during standing activities.
- Endurance: Improving tolerance for repeated movements and daily tasks.
- Functional movement: Practicing activities such as sitting, standing, reaching, and stepping.
- Exercise progression: Increasing difficulty as movement quality and tolerance improve.
The American Academy of Orthopaedic Surgeons’ strength-training guidance describes bodyweight exercise, resistance bands, and free weights as useful strengthening methods.
However, rehabilitation exercises must be adapted to the individual.
Someone recovering from a mild ankle sprain may require a different loading strategy from someone recovering from shoulder surgery or a fracture.
Essential Equipment for a Minimalist Rehabilitation Gym
Before buying equipment, identify the movements included in your rehabilitation program.
The most useful purchases are those that allow you to perform several exercises safely rather than accessories intended for only one activity.
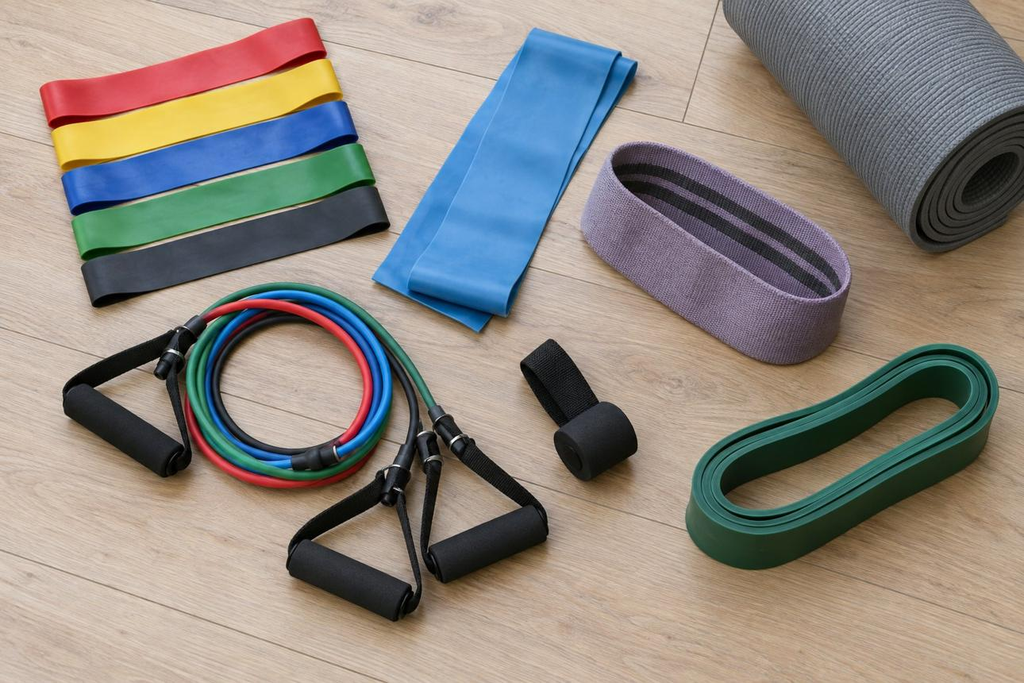
Resistance bands
Useful for adjustable resistance during shoulder, hip, knee, and ankle exercises.
Choose several resistance levels and inspect them for damage before use.

Exercise mat
Provides a comfortable surface for floor-based mobility, strengthening, and controlled movement exercises.
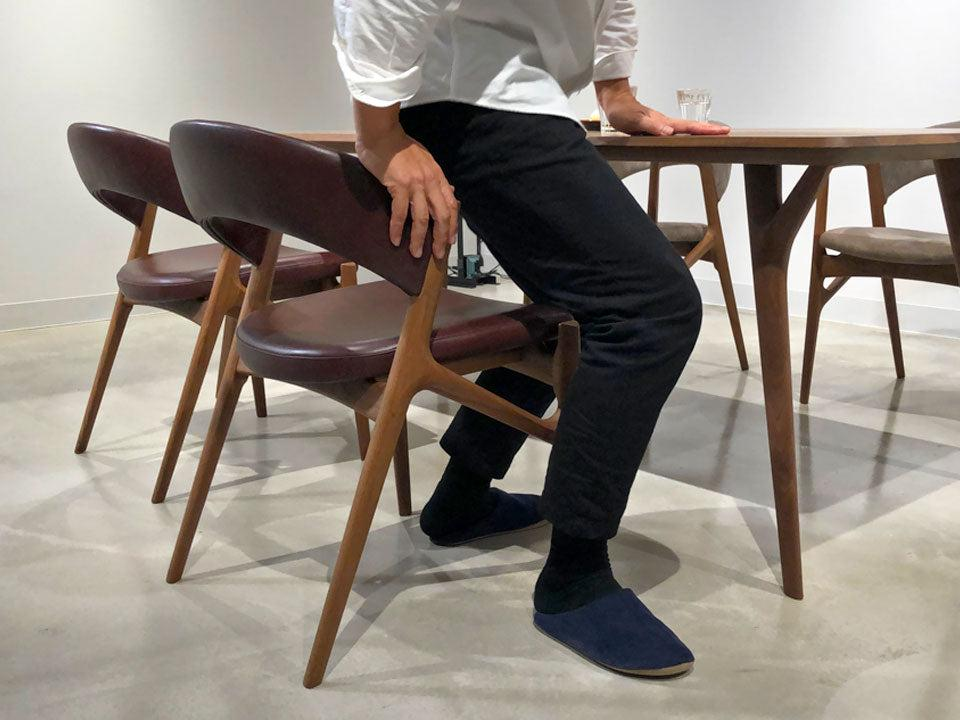
Stable chair
Supports sit-to-stand exercises, seated strengthening, and some supported movements.
Use a non-wheeled chair on a stable surface.
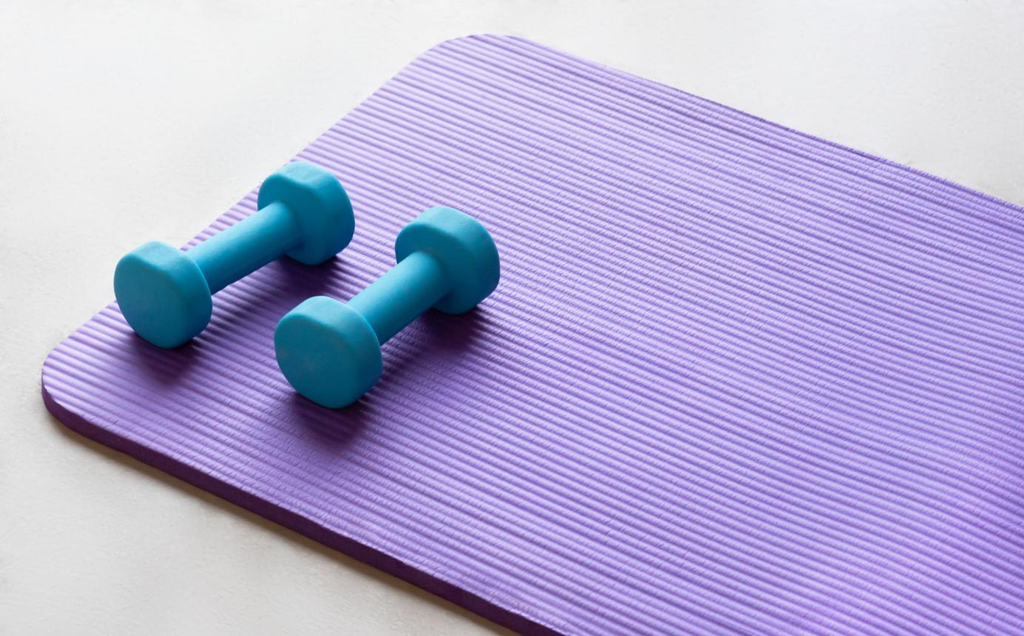
Light dumbbells
Offer measurable resistance for upper- and lower-body strengthening when external loading is appropriate.
Equipment comparison table
| Equipment | Main rehabilitation use | Priority |
|---|---|---|
| Long resistance bands | Rows, shoulder rotation, ankle resistance | High |
| Loop bands | Hip strengthening, lateral stepping | High |
| Stable chair | Sit-to-stand, seated exercises | High |
| Exercise mat | Floor mobility and strengthening | High |
| Light dumbbells | Progressive resistance exercises | Optional |
| Small step platform | Step-ups and controlled stepping | Optional |
| Balance pad | Advanced standing balance tasks | Optional |
| Foam roller | Comfortable positioning and selected mobility activities | Optional |
A foam roller is not necessary for tissue healing, and a balance pad is not automatically better than practicing balance on firm ground.
Each accessory should serve a specific rehabilitation goal.
How to Set Up a Safe Home Rehabilitation Space
An effective minimalist home gym can fit into a corner of a living room or bedroom.
The important requirements are safe footing, sufficient room for movement, and access to stable support.
Prepare the area before starting:
- Clear loose cables, rugs, and other trip hazards.
- Choose a firm, level floor.
- Keep a stable countertop or suitable support nearby for balance exercises.
- Position the mat so that it cannot slide during exercise.
- Make sure there is enough clearance for arm and leg movements.
- Keep resistance bands away from sharp edges.
- Use adequate lighting so you can see your equipment and surroundings.
- Store weights where they cannot roll or become obstacles.
If your rehabilitation includes exercises using an anchored resistance band, check the anchor’s compatibility and security.
A door anchor should only be used according to its manufacturer’s instructions, with the door securely closed and protected against unexpected opening.
Avoid attaching bands to unstable furniture, loose handles, or objects that might move under tension.
For someone recovering from a lower-limb injury, practicing near a stable countertop may be more appropriate than standing in an open area without support.
Choosing Equipment Based on the Injured Body Region
A minimalist home gym should be organized around the rehabilitation requirements of the injured area rather than a standard fitness routine.
Shoulder and upper-limb recovery
Shoulder rehabilitation may involve restoring range of motion, improving rotator cuff strength, and retraining scapular control.
Useful equipment includes:
- Light resistance bands for approved shoulder exercises.
- A towel for positioning the arm during selected movements.
- Light dumbbells when progressive loading is appropriate.
- A stable surface for supported exercises.
- A mat for prescribed lying exercises.
For example, a band row may be appropriate during some rehabilitation programs, but it may be restricted after certain surgical procedures.
The AAOS provides a rotator cuff and shoulder conditioning program that illustrates several strengthening exercises.
These are general examples, not an automatic prescription for every shoulder injury.
Knee and hip recovery
Lower-limb rehabilitation commonly addresses quadriceps strength, hip muscle capacity, balance, and functional activities.
Useful equipment includes:
- A stable chair for sit-to-stand exercises.
- Loop bands for selected hip-strengthening movements.
- A mat for floor exercises.
- A low, stable step when stepping exercises are permitted.
- Light weights for later strengthening progressions.
A sit-to-stand exercise is particularly practical because it trains a movement required throughout the day.
However, someone with postoperative weight-bearing restrictions or movement precautions may need to modify or avoid that activity.
Ankle and foot recovery
Ankle rehabilitation frequently includes controlled movement, calf strengthening, balance training, and gradual preparation for walking demands.
A basic setup may contain:
- A long resistance band for permitted ankle movements.
- A chair for seated exercises.
- A countertop for supported heel raises.
- A firm floor for balance training.
- A step for later-stage exercises when appropriate.
The AAOS foot and ankle conditioning program includes examples of resistance-band movements, calf exercises, and supported balance training.
Matching Exercises to the Stage of Recovery
The same equipment can be useful at several points in rehabilitation.
What changes is the amount of resistance, complexity of the movement, and physical demand.
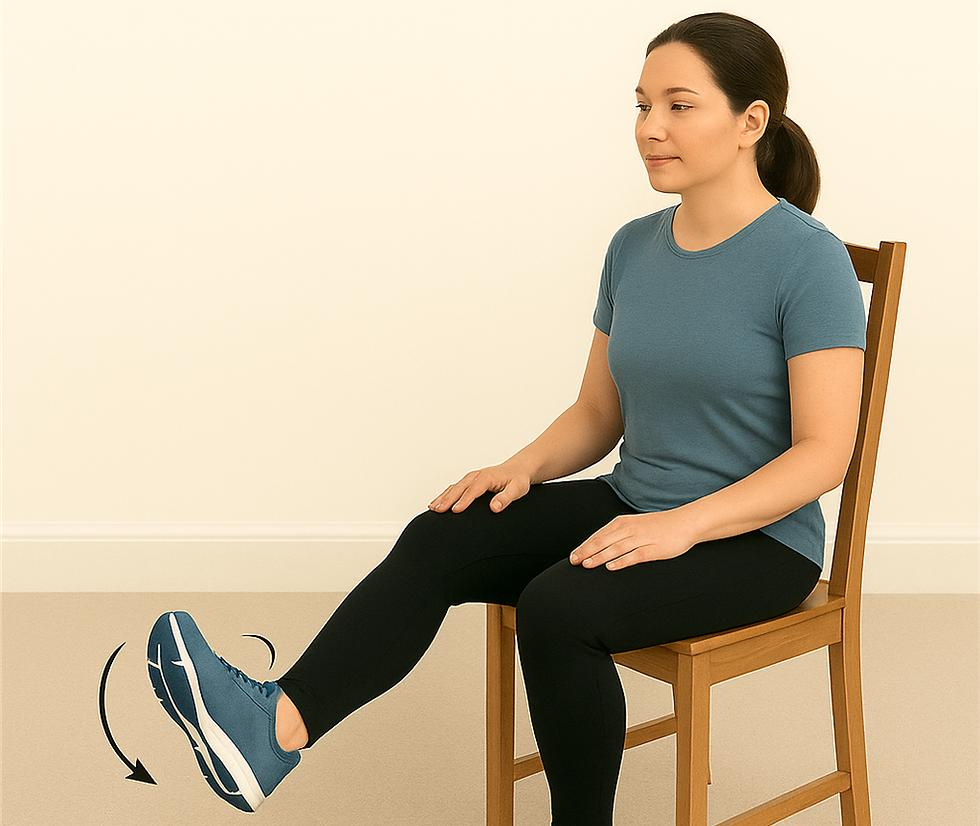
Early rehabilitation
Focus on permitted mobility, gentle muscle activation, and comfortable functional activity.
Exercise choice depends on tissue protection and any movement or loading restrictions.
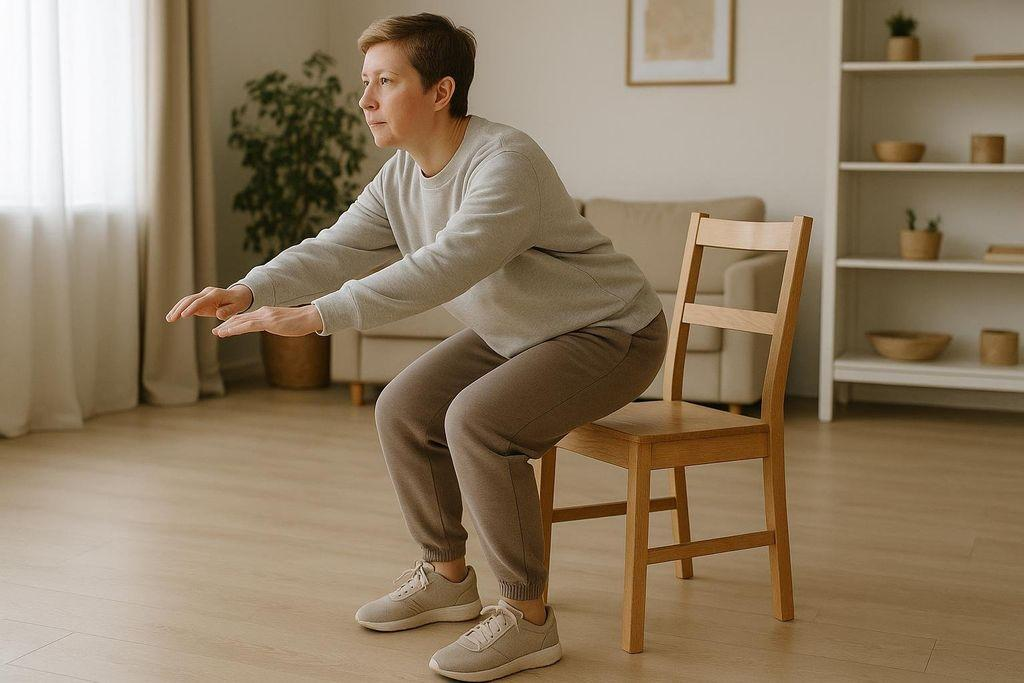
Intermediate rehabilitation
Progress strengthening, controlled weight-bearing, and basic functional tasks.
Bands, chairs, and light weights may become more useful.

Later rehabilitation
Develop higher strength demands, balance, endurance, and task-specific capacity.
Progress toward work, recreation, or sport requirements as appropriate.
Recovery does not always progress through clearly separated stages.
Pain, swelling, range of motion, functional ability, and the nature of the injury influence when exercises should change.
Practical Home Rehabilitation Exercise Examples
The following movements illustrate how a few pieces of equipment can support different rehabilitation goals.
They are not intended to be completed together as a universal injury-recovery workout.
Resistance-band row
This exercise may be used to strengthen the upper back and train controlled shoulder movement.
- Secure a suitable resistance band to an approved, stable anchor.
- Stand or sit facing the anchor.
- Hold the band with your arms extended comfortably.
- Pull your elbows backward in a controlled motion.
- Return slowly without allowing the band to snap back.
Choose a resistance that allows comfortable movement without compensatory shoulder elevation or trunk movement.
Sit-to-stand
This movement challenges the hips, knees, and lower-limb muscles while practicing a common daily activity.
- Sit on a stable chair with your feet supported.
- Position your feet at a comfortable distance apart.
- Lean forward as needed to initiate standing.
- Stand using your prescribed level of hand support.
- Lower yourself slowly back onto the chair.
Changing the chair height or hand assistance can alter the challenge.
Avoid this exercise if it conflicts with your weight-bearing or postoperative restrictions.
Supported heel raise
Heel raises can help strengthen the calf muscles when ankle loading is permitted.
- Stand facing a stable countertop.
- Place your hands on the support as needed.
- Raise your heels gradually.
- Pause briefly if comfortable.
- Lower your heels under control.
A seated heel raise may be a suitable alternative for some people, but it should not be assumed to provide an equivalent loading stimulus.
Supported single-leg balance
This activity challenges postural control and is sometimes used during lower-limb rehabilitation.
- Stand beside a stable support.
- Transfer weight onto the exercising leg.
- Lift the opposite foot only when appropriate.
- Maintain a comfortable, controlled posture.
- Use hand support whenever necessary.
Balance training should begin on a firm surface.
Unstable pads and eyes-closed variations are progressions, not starting requirements.
How to Progress Resistance Without Overloading the Injury
Progressive loading is a central principle of many rehabilitation programs.
The goal is to provide enough physical demand to improve capacity while respecting tissue healing and symptom tolerance.
Increasing exercise difficulty does not always mean using a heavier weight.
You can modify:
- Resistance: Move from a lighter band to a stronger one.
- Repetitions: Increase repetitions when the current workload is well tolerated.
- Sets: Add work gradually when recovery between sessions is adequate.
- Movement range: Increase toward the permitted range as control improves.
- Tempo: Use slower, controlled movements when appropriate.
- Support: Reduce hand assistance during approved balance exercises.
- Functional demand: Progress from simpler movements to activities resembling daily tasks.
For example, a patient performing comfortable sit-to-stands with both hands assisting may gradually use less assistance before considering additional resistance.
Avoid increasing resistance, volume, speed, and complexity simultaneously.
Changing one main variable makes it easier to assess the response.
The AAOS safe exercise recommendations emphasize gradual progression rather than attempting demanding workouts immediately.
Monitoring Pain and Recovery After Exercise
Symptoms during and after rehabilitation can help determine whether the exercise dose is appropriate.
However, pain is only one part of the assessment and does not always reflect the degree of tissue loading or healing.
Observe your response in three periods:
- During exercise: Notice changes in pain, movement quality, weakness, or instability.
- After exercise: Check for unusual soreness, joint swelling, or reduced movement.
- The following day: Assess whether symptoms and functional ability have returned to their usual level.
Mild, temporary discomfort may be acceptable in some rehabilitation programs, particularly for certain persistent musculoskeletal conditions.
Other injuries, postoperative procedures, and healing tissues may require stricter limits.
Do not apply a universal pain score or assume that every painful exercise is beneficial.
Stop the exercise and seek professional assessment if you experience:
- Sharp or rapidly worsening pain.
- New or increasing joint swelling.
- Repeated giving way or unexpected loss of stability.
- New numbness or significant weakness.
- Markedly reduced ability to bear weight.
- Symptoms that continue to deteriorate despite reducing activity.
Urgent medical assessment is warranted for concerning symptoms such as chest pain, severe breathlessness, or sudden major neurological changes.
Building a Simple Weekly Rehabilitation Routine
Consistency matters more than owning numerous pieces of equipment.
A short, individualized routine that you can perform reliably is generally more useful than an elaborate plan you rarely complete.
Here is an example of how to organize a home session once the relevant activities have been approved.
Illustrative home session
Not a fixed rehabilitation prescription
- Warm-up: Gentle walking or approved movement to prepare for exercise.
- Mobility: Prescribed joint movements within any relevant restrictions.
- Strength: Two or three exercises targeting the identified rehabilitation goals.
- Balance or control: A supported activity if relevant to the injury.
- Functional practice: An appropriate movement such as sit-to-stand or controlled stepping.
- Review: Record symptoms, difficulty, and how the body responds afterward.
Strengthening frequency and recovery periods depend on the injury, exercise intensity, and rehabilitation stage.
Mobility work may be performed more frequently than demanding strengthening exercises.
For general strength training, the AAOS describes regular training with adequate recovery between harder sessions.
Individual rehabilitation plans can differ substantially from those general exercise recommendations.
Common Mistakes When Creating a Home Recovery Gym
Most home rehabilitation problems are not caused by a lack of equipment.
They arise when the exercises, resistance, or setup do not match the person’s abilities and restrictions.
Common mistakes include:
- Purchasing equipment before knowing which exercises are needed.
- Starting with resistance that is too challenging.
- Copying advanced rehabilitation routines from social media.
- Using unstable furniture for support.
- Anchoring bands without checking their security.
- Progressing exercises despite worsening symptoms.
- Assuming soreness proves that an exercise is effective.
- Neglecting balance or functional movement when these are rehabilitation goals.
- Replacing prescribed exercises with unrelated fitness workouts.
- Continuing the same exercise difficulty indefinitely without reassessment.
One particularly common issue in clinical rehabilitation is focusing only on the injured joint while overlooking the broader movement requirements of the person.
For example, ankle rehabilitation may also require rebuilding confidence during walking, balance, and changes in direction.
An isolated resistance-band exercise cannot address every functional demand.
When Home Equipment Is Not Enough
A minimalist home gym can support rehabilitation, but it cannot replace every component of physical therapy.
Some situations require supervised assessment, specialized equipment, or hands-on guidance.
These may include:
- Complex injuries with multiple structures involved.
- Rehabilitation following surgery with specific loading restrictions.
- Persistent instability or recurrent falls.
- Significant movement limitations that are not improving.
- Neurological impairments affecting coordination or muscle control.
- High-demand return-to-sport testing.
- Difficulty performing exercises safely without assistance.
Physical therapists can assess movement, identify relevant impairments, adapt exercise loads, and determine whether your home program is meeting its intended goals.
As recovery progresses, some people may also need access to heavier resistance, cardio equipment, or specialized training environments.
A minimalist setup does not have to remain the only exercise option throughout rehabilitation.
Conclusion
A minimalist equipment home gym setup for injury recovery should be simple, safe, and adaptable.
For many people, resistance bands, a stable chair, an exercise mat, and optional light weights provide enough variety to support a meaningful home exercise program.
Start with the movements that are appropriate for your injury, monitor your response, and progress exercises according to rehabilitation goals rather than equipment availability.
The best setup is one that allows you to perform your prescribed exercises consistently and safely.
Frequently Asked Questions
1. What equipment do I need for a basic injury recovery home gym?
A pair of resistance bands, a stable chair, and a nonslip exercise mat are a practical starting point.
Light dumbbells can be added when external resistance is appropriate.
The equipment you actually need depends on your injury and prescribed exercises.
2. Can I recover from an injury using only resistance bands?
Resistance bands can support many strengthening exercises, but they do not address every rehabilitation requirement.
Recovery may also involve mobility, balance, endurance, and functional training.
Some injuries require professional supervision or equipment that bands cannot replace.
3. Are dumbbells better than resistance bands for rehabilitation?
Neither is universally better.
Resistance bands provide changing resistance across a movement, while dumbbells provide a load determined by gravity and body position.
The choice depends on the movement, required loading characteristics, and current rehabilitation goals.
4. How much space do I need for a home rehabilitation gym?
Many basic exercises can be performed in a small, clear area with enough room to extend the arms and legs safely.
The exact space requirement depends on the exercises.
Ensure that furniture, cables, and other obstacles do not interfere with movement.
5. Should I exercise every day during injury recovery?
Not necessarily.
Some prescribed mobility exercises may be suitable for frequent practice, whereas challenging strengthening activities often require recovery time.
Exercise frequency should reflect tissue healing, symptoms, workload, and the recommendations of your physical therapist.
6. Can I perform home rehabilitation exercises while experiencing pain?
This depends on the injury and the exercise.
Some rehabilitation programs permit tolerable, temporary discomfort, while others require pain-free movement or strict protection.
Increasing pain, swelling, or functional deterioration should prompt modification and professional reassessment.
7. Is a balance board necessary after an ankle injury?
No.
Many people begin balance rehabilitation on a firm floor while using a countertop or other stable support.
A balance board may be introduced later when increased difficulty is appropriate, but it is not essential for every patient.
8. Are exercise mats necessary for rehabilitation?
An exercise mat is useful for comfort during floor-based exercises, but it is not required for every program.
Some people may perform all prescribed exercises while sitting or standing.
Choose a mat that stays secure and does not make transfers to or from the floor unsafe.
9. When should I increase resistance during home exercises?
Resistance may be increased when the current exercise is performed with good control, adequate tolerance, and without an unacceptable symptom response.
The timing also depends on healing restrictions and rehabilitation objectives.
Progress gradually rather than increasing several training variables together.
10. Can a home gym replace physical therapy appointments?
A home gym can help you carry out the exercise component of rehabilitation, but it cannot replace individualized assessment when that is needed.
Physical therapy appointments may be necessary to evaluate progress, adjust loading, address new symptoms, and determine readiness for more demanding activities.