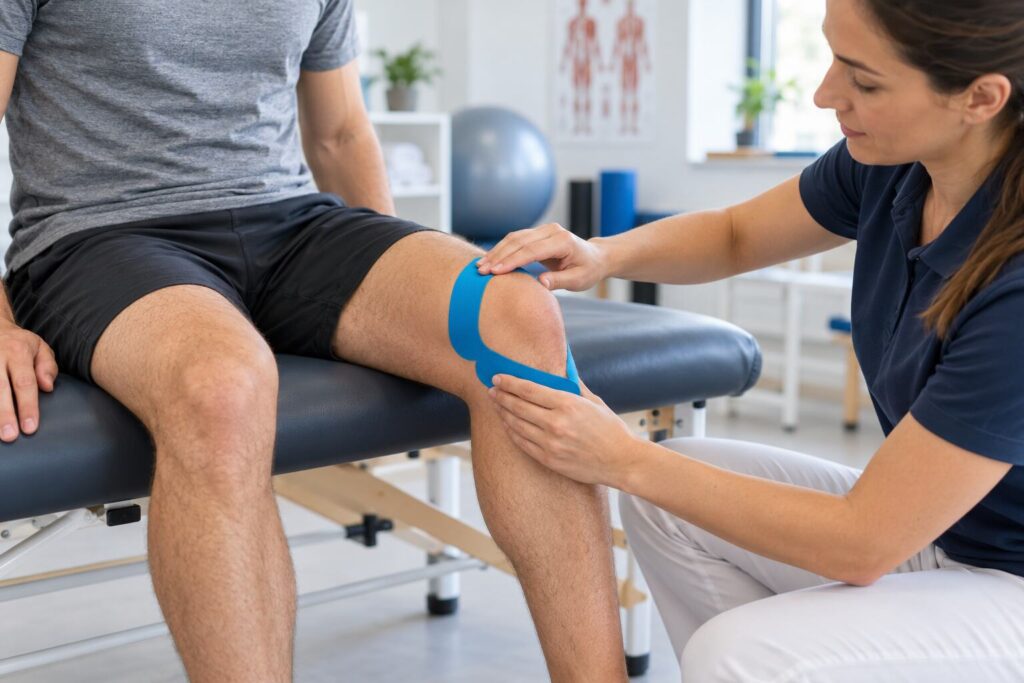
Yes, kinesiology tape can be used as a short-term support for some types of knee pain, but it works best as an optional add-on rather than the main treatment. This guide explains a cautious application method, how to judge the response, which exercises usually matter more, and when knee symptoms need assessment.
What kinesiology tape can and cannot do
Kinesiology tape is an elastic adhesive tape applied to the skin. Some people report temporary comfort, greater confidence during movement, or a useful cue to control the knee, but the tape does not repair injured tissue or permanently change joint alignment.
Research does not support treating every knee problem with the same taping method. A systematic review of taping for knee osteoarthritis found more consistent results for non-elastic taping than for elastic kinesiology tape, with substantial variation across studies.
- Possible role: short-term comfort during selected activities
- Possible role: a light sensory cue for movement awareness
- Not a role: diagnosing the source of knee pain
- Not a role: replacing progressive exercise or appropriate medical care
When knee taping may be worth trying
A brief tape trial may be reasonable when the goal is to make walking, stairs, training, or prescribed exercise more comfortable. The response should be obvious enough to matter in the activity you want to improve.
- Symptoms are mild to moderate and the knee can take weight
- The skin is healthy and sensation is normal
- A repeatable task, such as a step-down, can be checked before and after
- Tape helps the task without creating new discomfort
- The person understands that benefit may be temporary
For osteoarthritis, the NICE osteoarthritis recommendations place therapeutic exercise at the centre of management and advise against routinely offering tape unless instability or abnormal biomechanical loading makes it relevant.
Check the knee and skin before applying tape
Do not use tape to conceal symptoms that could indicate a more serious problem. First check the skin and make sure the planned activity is otherwise safe.
- Look for cuts, rash, infection, blisters, or fragile skin
- Ask about previous reactions to adhesives
- Check for normal colour, warmth, and sensation below the knee
- Do not tape over unexplained calf swelling or suspected circulation problems
- Seek assessment after major trauma, deformity, inability to bear weight, or a hot swollen joint
A small patch test can be useful for sensitive skin. Remove it if itching, burning, or redness develops rather than waiting for the reaction to worsen.
What you need
Simple preparation improves adhesion and makes removal easier. Choose genuine elastic kinesiology tape from a sealed roll and avoid products that already irritate the skin.
- Two strips of kinesiology tape long enough to border the kneecap
- Clean scissors for rounded corners
- Soap and water or a skin-safe cleansing wipe
- A towel to dry the skin fully
- Optional adhesive-removal oil for later removal
Prepare the tape and knee
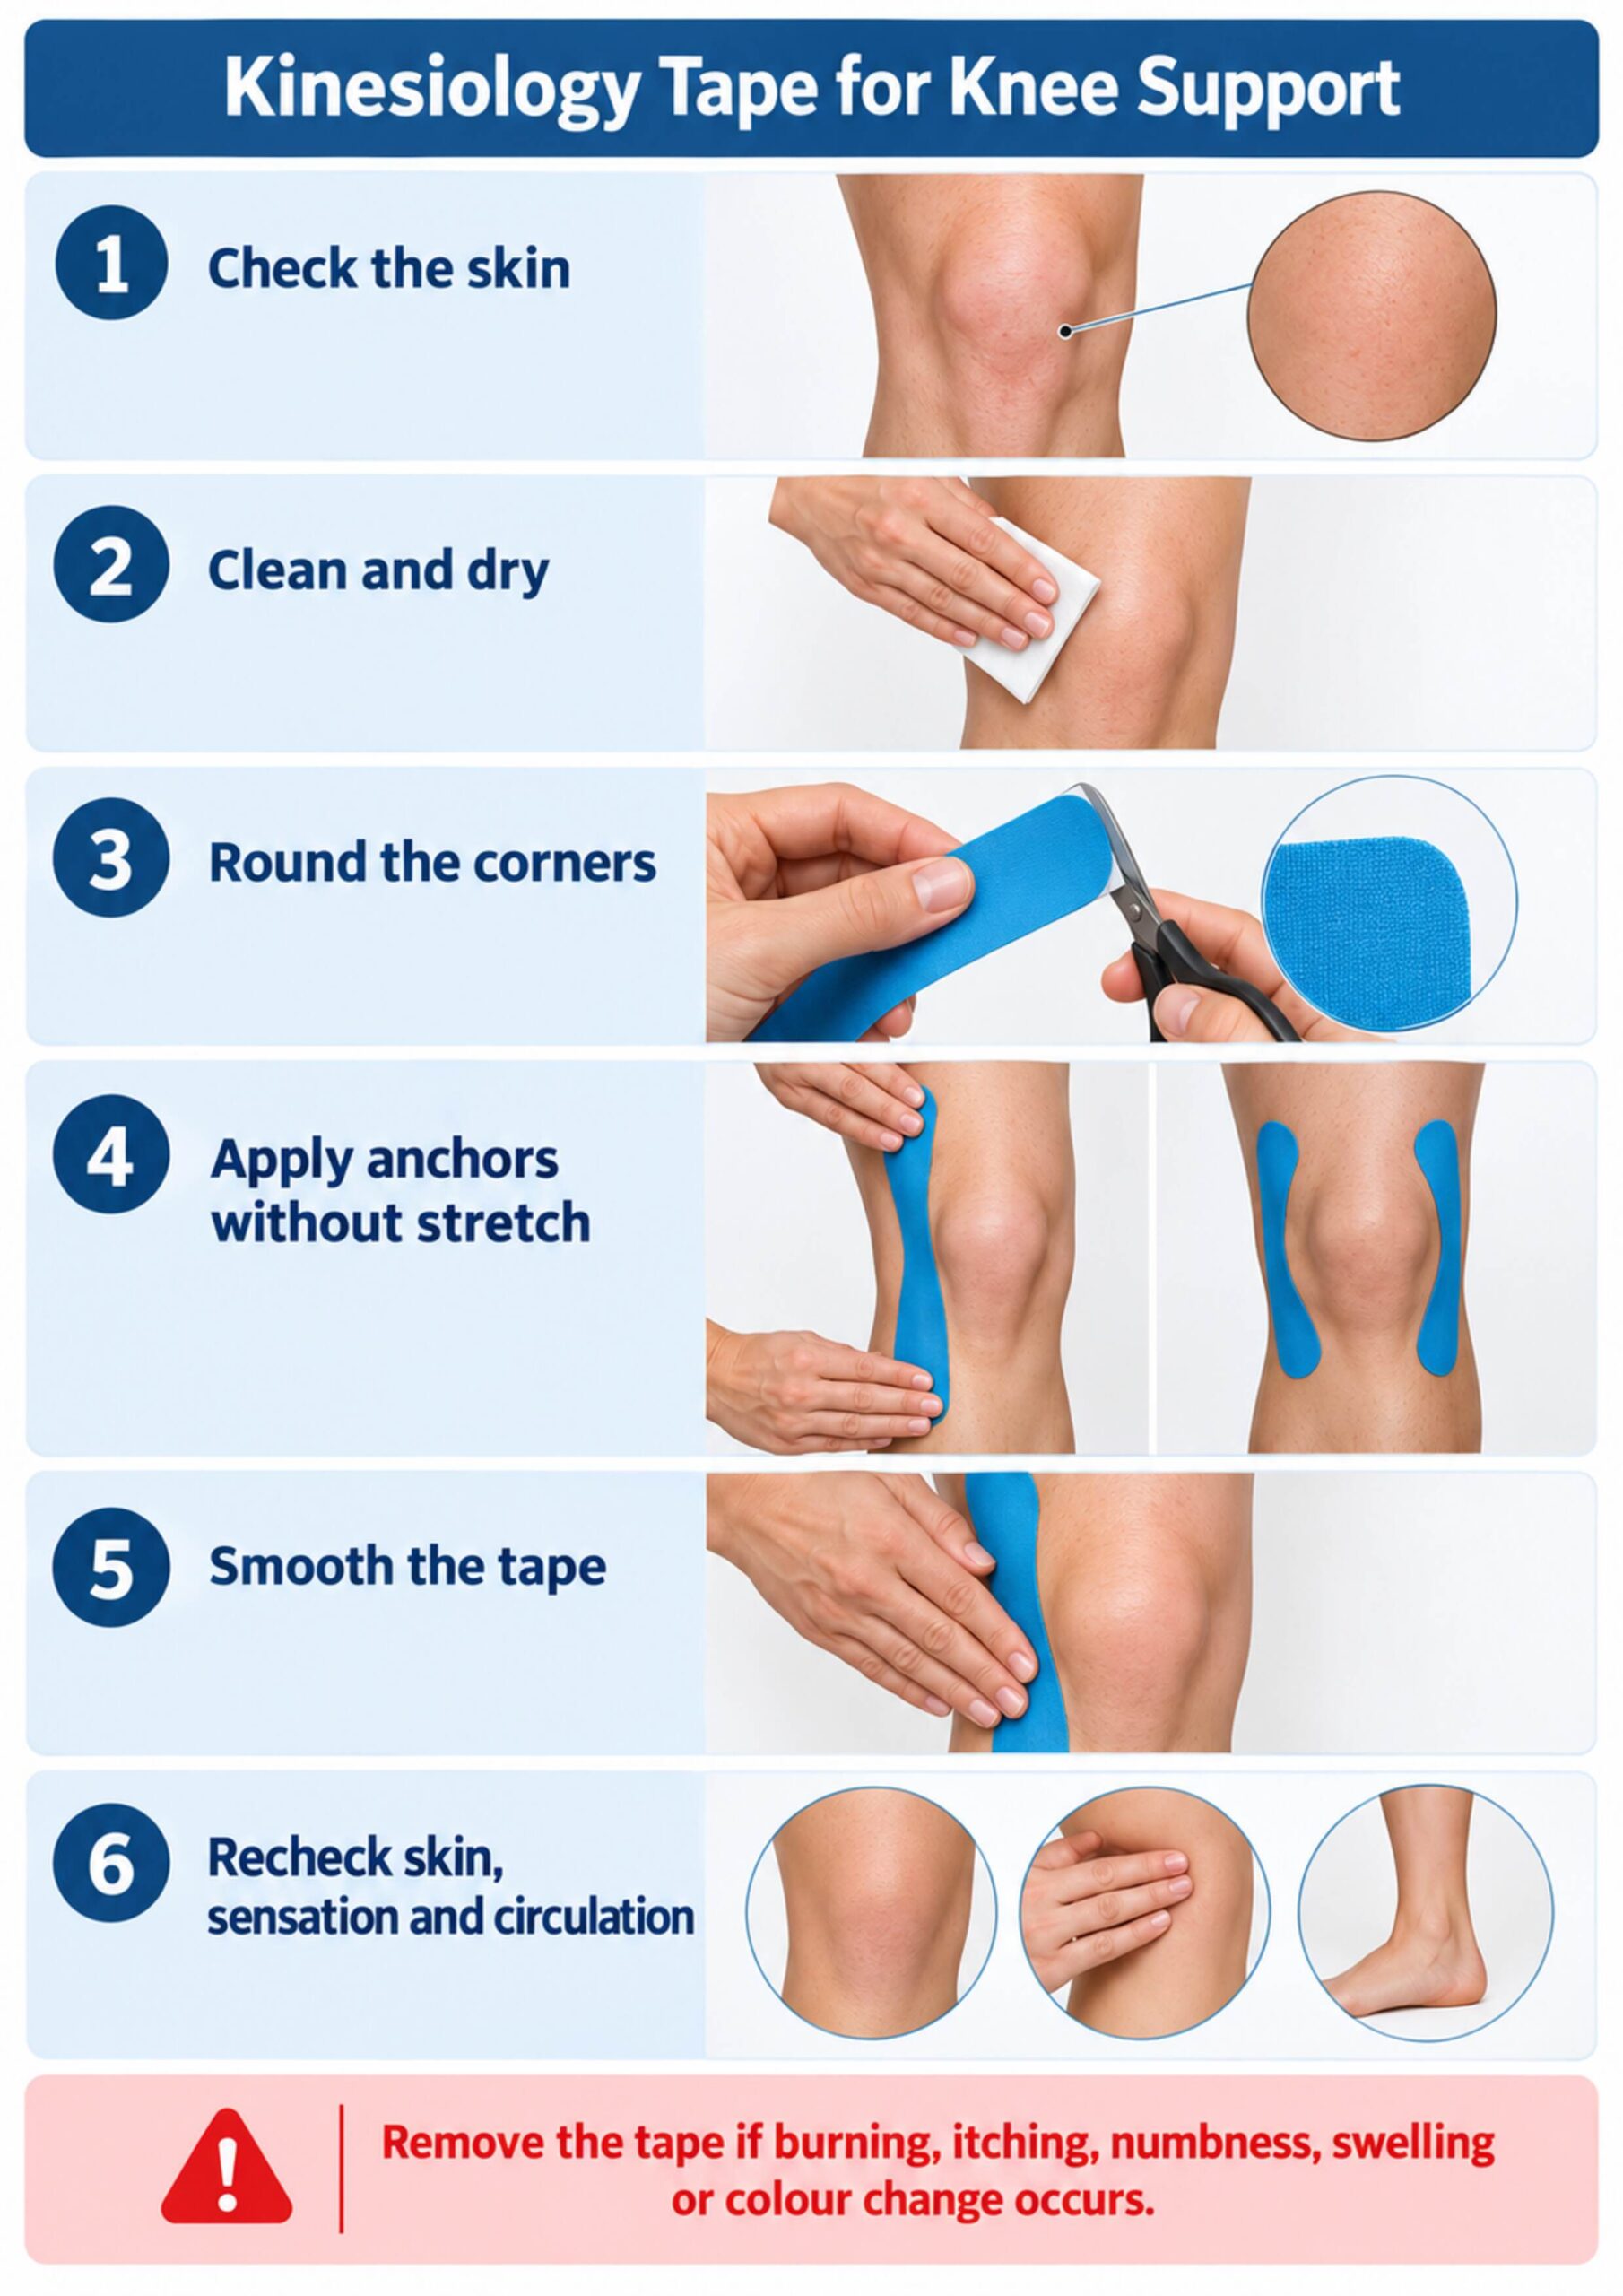
Sit with the knee comfortably bent so the skin is not stretched to an extreme. Clean away lotion, sweat, and oils, then allow the skin to dry completely.
- Trim excess hair only if needed; avoid shaving immediately beforehand
- Round each tape corner to reduce early lifting
- Tear the backing paper without touching most of the adhesive
- Keep the kneecap visible rather than covering it with overlapping tape
- Plan a route that does not circle tightly around the whole limb
A practical two-strip application
This general layout is a comfort-focused starting point, not a condition-specific prescription. A clinician may alter the direction, length, or number of strips after examining the knee and observing the task that provokes symptoms.
- Place the first end of one strip above and slightly to the inside of the kneecap with no stretch.
- Guide the middle of the strip down beside the inner border of the kneecap using only light, comfortable tension.
- Lay the final end below the knee without stretch.
- Repeat on the outer border with the second strip, keeping the kneecap uncovered.
- Smooth each strip from the centre toward the ends to activate the adhesive.
- Stand, bend, and straighten the knee several times, then check the skin and circulation.
The tape should not create a strong pulling sensation. Application percentages are difficult to reproduce accurately outside a controlled protocol, so comfort, intact skin, and an untensioned anchor are safer practical guides.
Test the result with a meaningful movement
Choose one task before applying the tape and repeat it in the same way afterward. A useful trial changes comfort, confidence, or movement quality without producing numbness, skin symptoms, or restriction.
- Walk the same short distance at the same pace
- Climb the same flight of stairs using the same rail
- Repeat a shallow sit-to-stand from the same chair
- Perform the prescribed step or squat exercise at the same depth
- Record whether the difference is meaningful, small, or absent
Build the plan around exercise and activity
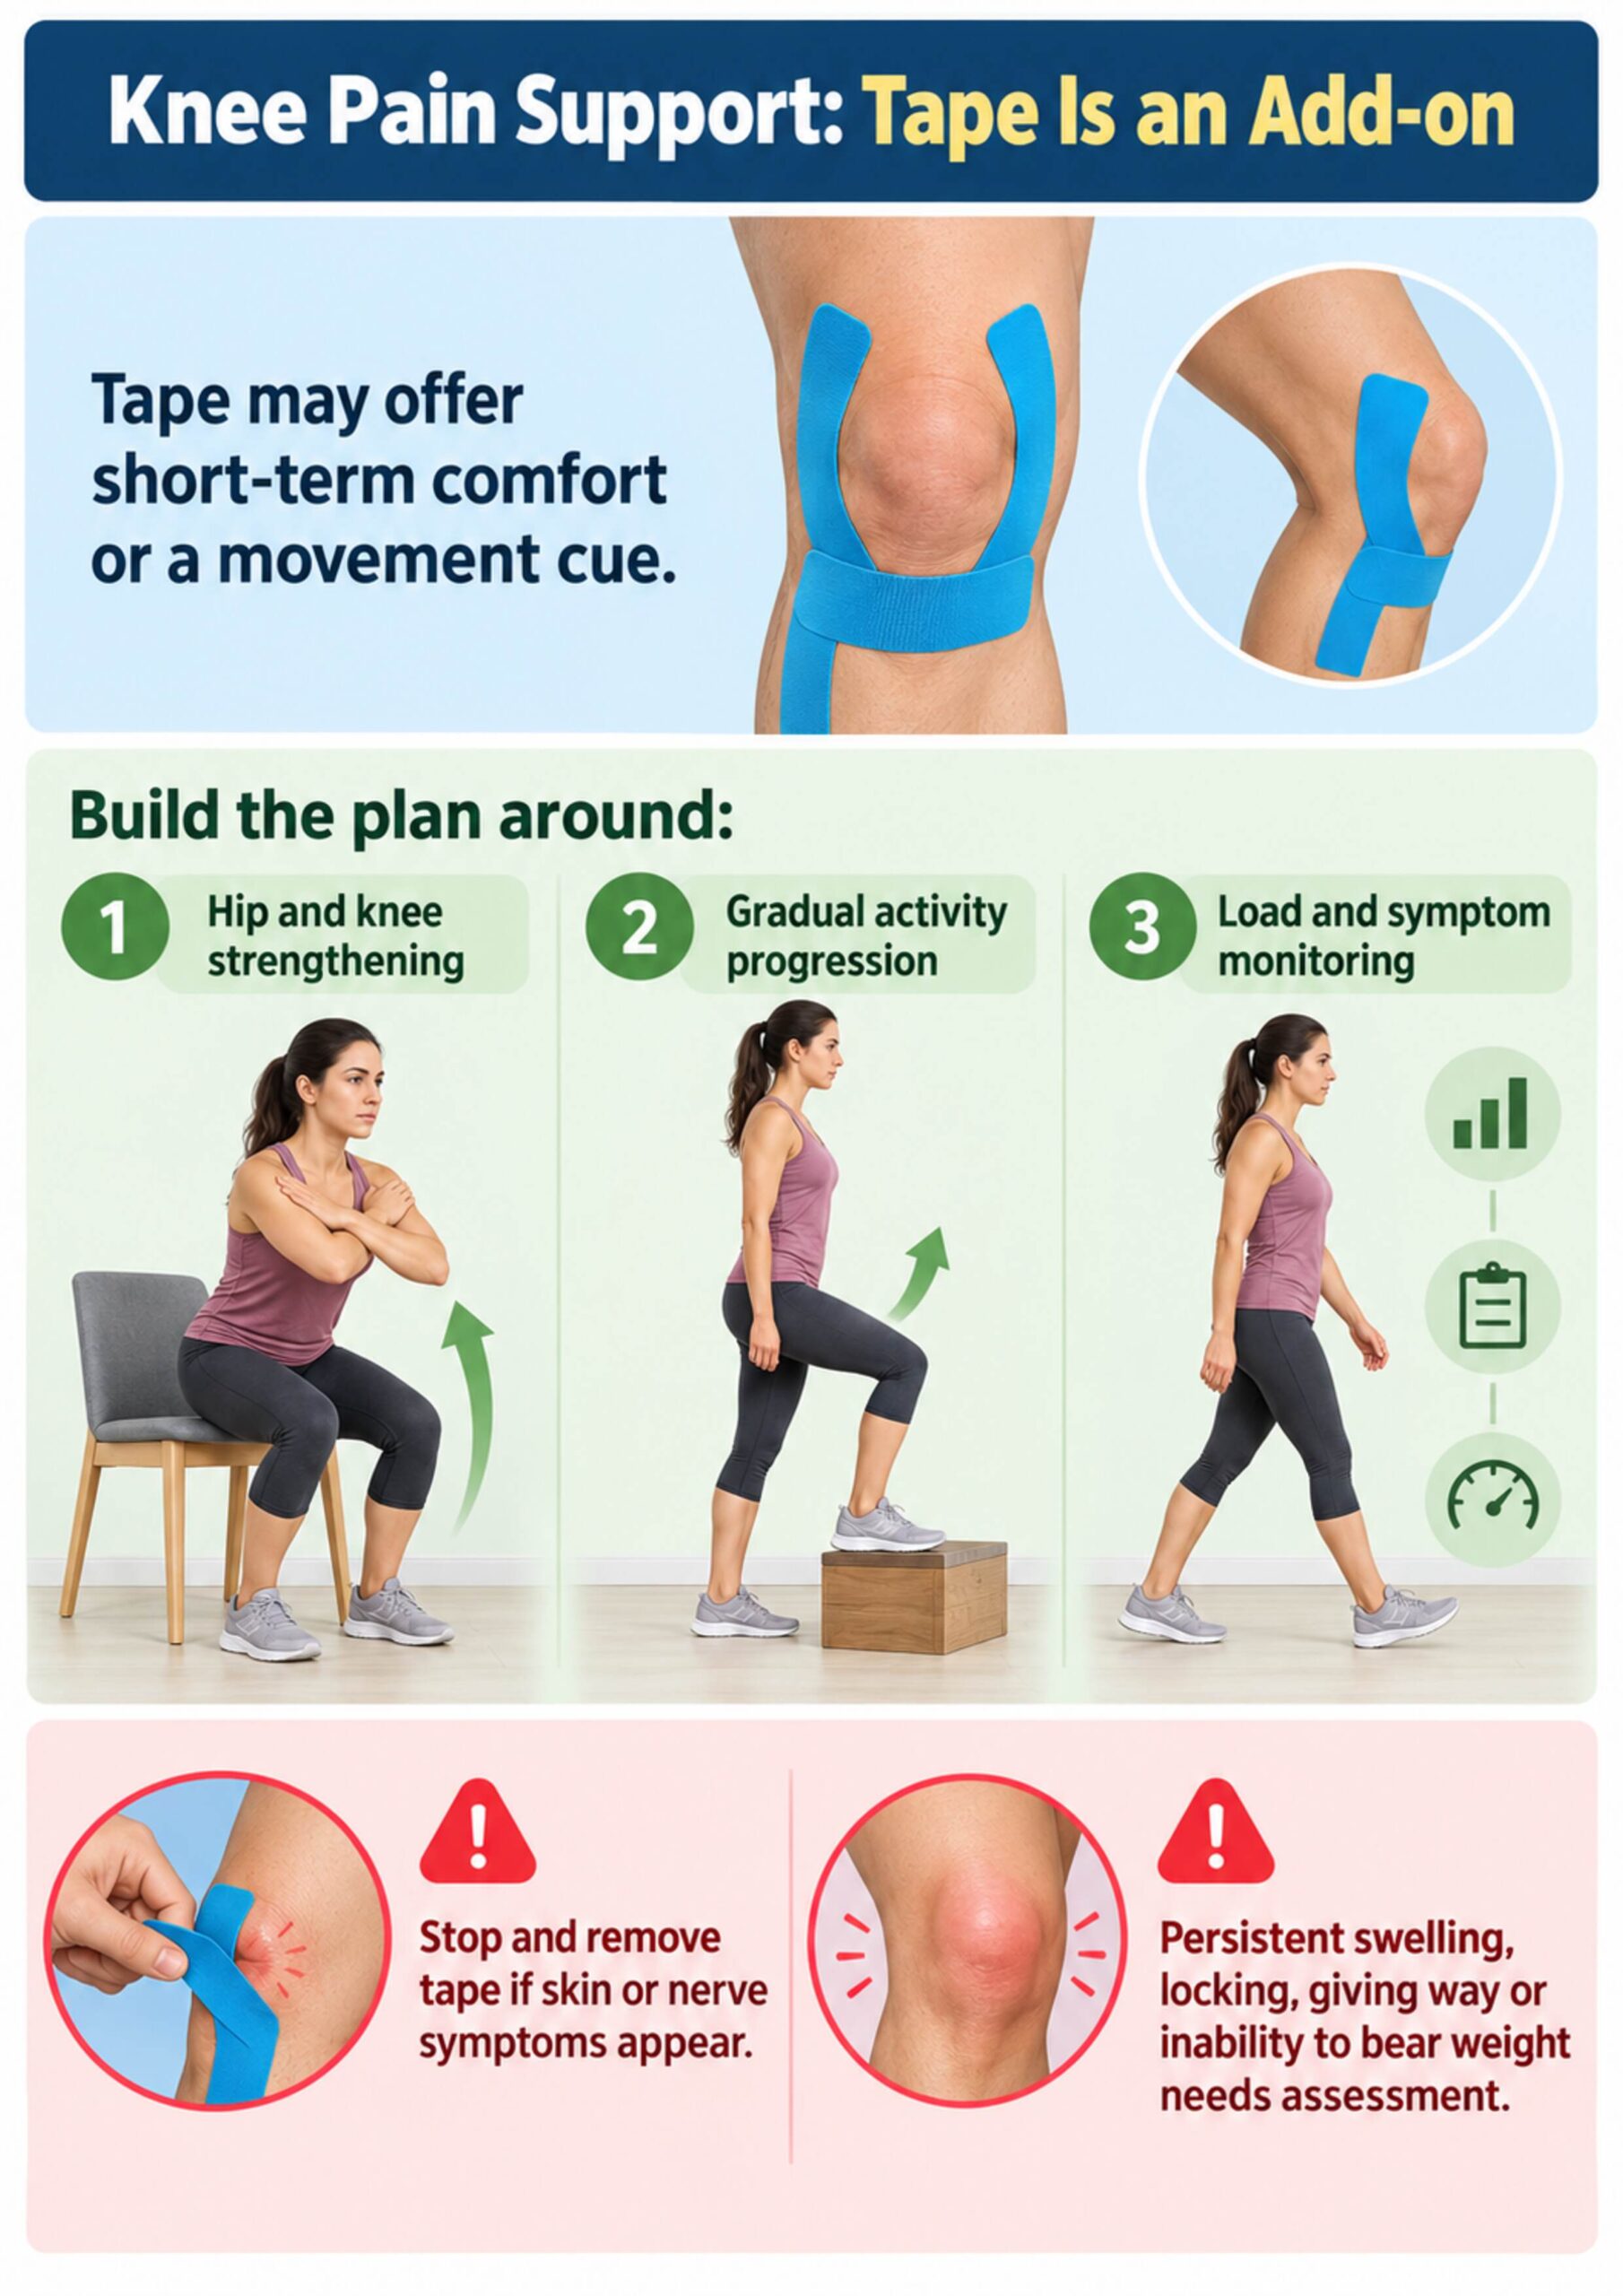
For many common knee pain presentations, strength and gradual exposure to activity matter more than tape. An international patellofemoral pain consensus statement supports combined hip- and knee-focused exercise, while taping may be included within a broader programme for selected people.
- Sit-to-stand: use a stable chair and control both the lowering and rising phases
- Low step-up: keep the whole foot supported and progress step height gradually
- Bridge: lift the pelvis without holding the breath or forcing the knee
- Side-lying hip abduction: keep the trunk steady and move from the hip
- Calf raise: use a support and rise through a comfortable range
Exercise dose should match the diagnosis, current capacity, and symptom behaviour. Mild short-lived discomfort may be acceptable in some rehabilitation plans, while increasing swelling, loss of function, or symptoms that persist after activity calls for adjustment.
| Strategy | Main purpose | How to judge it | Key limitation |
|---|---|---|---|
| Kinesiology tape | Short-term comfort or movement cue | Repeat the same task before and after | Does not identify or correct the underlying cause |
| Strength exercise | Build load capacity | Track control, repetitions, resistance, and recovery | Needs gradual progression over time |
| Activity adjustment | Reduce excessive symptom spikes | Monitor symptoms during and after activity | Too much avoidance can reduce capacity |
| Clinical assessment | Clarify diagnosis and guide treatment | History, examination, and tests when indicated | No single test explains every knee complaint |
Wear time, exercise, and daily monitoring
Follow the tape manufacturer’s wear and water-care instructions because adhesives and skin tolerance differ. For a first trial, check the skin frequently and avoid sleeping through an emerging reaction.
- Confirm that shoes and clothing do not pull on the tape
- Pat the tape dry after washing rather than rubbing it
- Recheck the edges and skin after exercise
- Remove the tape if its benefit disappears or symptoms worsen
- Do not repeatedly tape irritated skin
Remove tape without injuring the skin
Peel tape slowly in the direction of hair growth while supporting the skin with the other hand. Warm water or a skin-safe oil can soften stubborn adhesive; forceful dry removal can damage the upper skin layer.
- Roll the tape back low and parallel to the skin
- Pause if the skin lifts or becomes painful
- Wash away adhesive residue gently
- Inspect for redness, blisters, or broken skin
- Allow irritated skin to recover before considering another application
When to stop or seek professional advice
Remove the tape immediately if it causes burning, itching, numbness, tingling, swelling, colour change, or increased pain. New weakness, spreading numbness, marked swelling, locking, repeated giving way, fever, or inability to bear weight warrants professional assessment rather than another taping attempt.
- Stop if symptoms travel below the knee
- Stop if the tape feels restrictive as swelling develops
- Seek urgent care for a hot swollen joint with systemic illness
- Arrange assessment when symptoms follow significant trauma
- Ask a clinician for help when the diagnosis or safe exercise level is unclear
Common taping mistakes
More tension and more tape do not equal more support. A comfortable, simple application is easier to monitor and less likely to irritate the skin.
- Stretching the anchors instead of laying them down gently
- Wrapping tape tightly around the entire knee or calf
- Applying over lotion, sweat, wounds, or a rash
- Using tape to push through rapidly worsening pain
- Changing several treatments at once, making the response impossible to interpret
Conclusion
Kinesiology tape may provide temporary comfort or a movement cue for selected people with knee pain, but the effect should be tested rather than assumed. Use healthy skin, untensioned anchors, a simple task-based comparison, and a plan centred on exercise, activity progression, and appropriate assessment.
Frequently asked questions
Can kinesiology tape cure knee pain?
No. Tape may change symptoms temporarily, but it does not by itself repair injured tissue or address every source of knee pain.
How tight should knee tape feel?
It should feel comfortable and should not restrict circulation, sensation, or normal knee movement. Remove it if it creates pressure, tingling, numbness, or colour change.
Should I tape directly over the kneecap?
A common comfort-focused layout borders the kneecap and leaves it visible. Condition-specific techniques vary, so individual assessment is useful when symptoms persist.
Can I exercise while wearing kinesiology tape?
Yes, if the planned exercise is otherwise appropriate and the tape does not worsen symptoms or restrict movement. Recheck the skin after activity.
Can tape replace knee-strengthening exercises?
No. Progressive hip and knee strengthening usually has a more important role in building long-term capacity than passive support alone.
What if the tape does not change my pain?
Remove it if it offers no useful benefit. A failed tape trial does not identify the diagnosis; review activity load, exercise technique, and the need for assessment.
Can I use tape on swollen skin?
Avoid tightly taping a swollen limb, particularly when the cause is unclear. Sudden or marked swelling, calf pain, heat, or colour change needs medical assessment.
Is redness after removing tape normal?
Brief mild colour change can occur from contact, but persistent redness, itching, blisters, or broken skin suggests irritation. Let the skin recover and avoid reapplication.
Can I shower with kinesiology tape?
Many products are water-resistant, but follow the manufacturer’s instructions. Pat the tape dry and check that damp edges are not rubbing the skin.
When should knee pain be assessed?
Seek assessment after significant trauma or when there is inability to bear weight, locking, repeated giving way, marked swelling, fever, progressive weakness, or symptoms that do not improve with sensible self-management.