
The Anterior Drawer Test of the Ankle assesses anterior laxity of the ankle during a manual examination.
It can support the assessment of lateral ligament injury, particularly involvement of the anterior talofibular ligament (ATFL), but its findings must be interpreted alongside the history and the rest of the examination.
What Is the Anterior Drawer Test of the Ankle?
This orthopedic special test examines how the talus and foot move anteriorly relative to the lower leg when the examiner stabilizes the tibia and draws the heel forward.
It is a passive ligament stress test, not a strength test or a measure of overall ankle function.
The ATFL is an important restraint relevant to this maneuver.
However, the manual test does not independently identify every injured structure or establish the extent of a tear.
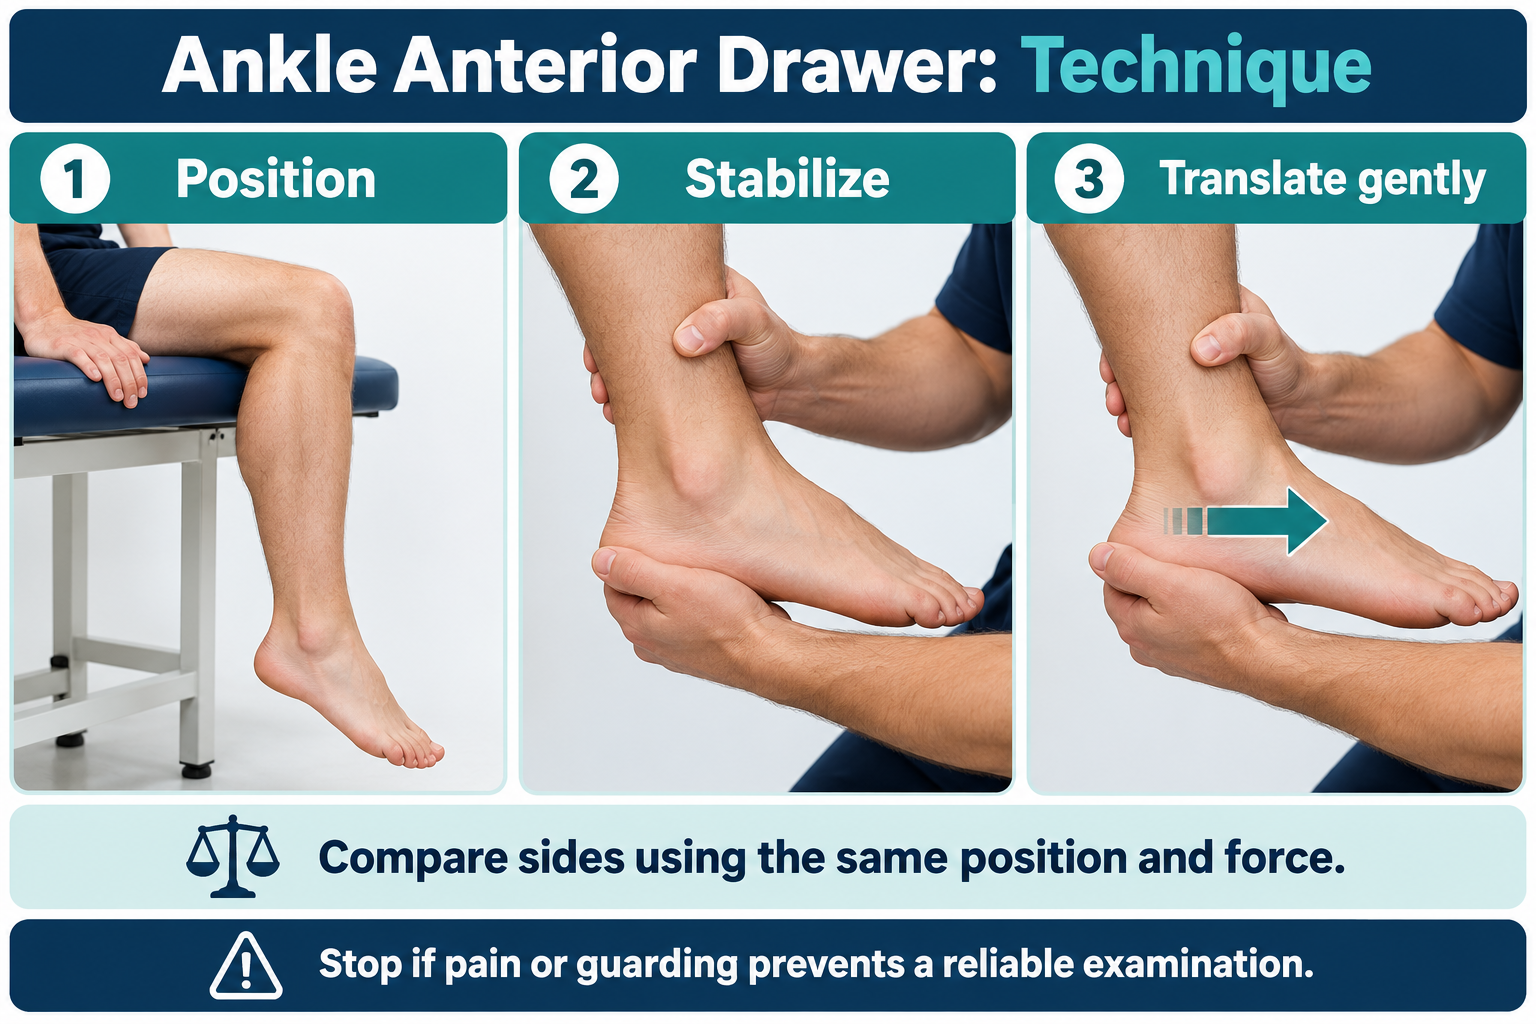
Purpose and Indications
- Investigate suspected mechanical laxity after a lateral ankle sprain.
- Contribute to assessment when recurrent sprains or episodes of giving way are reported.
- Compare anterior movement and endpoint with the opposite ankle when that comparison is appropriate.
- Document ligament examination findings as part of a broader ankle assessment.
Keep mechanical laxity separate from the patient’s experience of instability.
A history of giving way and a manual laxity finding describe different aspects of the presentation; record both rather than treating them as interchangeable.
Contraindications and Precautions
Establish whether stress testing is appropriate before applying force.
The Merck Manual guidance on ankle sprain examination notes that marked pain, swelling or spasm can limit assessment and that suspected fractures require evaluation before stress testing.
- Defer the maneuver when fracture or dislocation is suspected and arrange appropriate assessment.
- Respect restrictions after surgery or a known injury for which ligament stress is not permitted.
- Do not force through pain, apprehension or protective muscle contraction.
- If symptoms prevent a meaningful examination, document the limitation and consider reassessment when clinically appropriate.
Patient and Examiner Position
The following describes a commonly used seated manual technique.
Other variants exist, so document the position rather than assuming all anterior drawer examinations are equivalent.
- Patient: seated at the edge of a plinth, with the knee flexed and lower leg relaxed.
- Ankle: supported in slight plantarflexion rather than forced to an extreme position.
- Examiner: positioned in front of the ankle with comfortable access to the distal shin and heel.
- Hands: one stabilizes the distal tibia; the other cups the heel.
How to Perform the Anterior Drawer Test of the Ankle
- Explain the maneuver and ask the patient to keep the leg relaxed and report discomfort.
- Position and support the ankle consistently. When suitable, examine the opposite side first to appreciate the patient’s baseline movement.
- Stabilize the distal tibia above the ankle with one hand.
- Cup the heel with the other hand rather than pulling on the toes or forefoot.
- Gently draw the heel and foot anteriorly relative to the stabilized lower leg.
- Assess movement, the quality of the endpoint and the patient’s response. Avoid substituting an inversion maneuver for the drawer.
- Compare sides using a similar position and force, then record the findings and any guarding.
The MSK Medicine ankle drawer demonstration illustrates heel support and anterior translation.
Consistent stabilization helps the examiner judge relative movement rather than movement of the entire leg.
What Constitutes a Positive Finding?
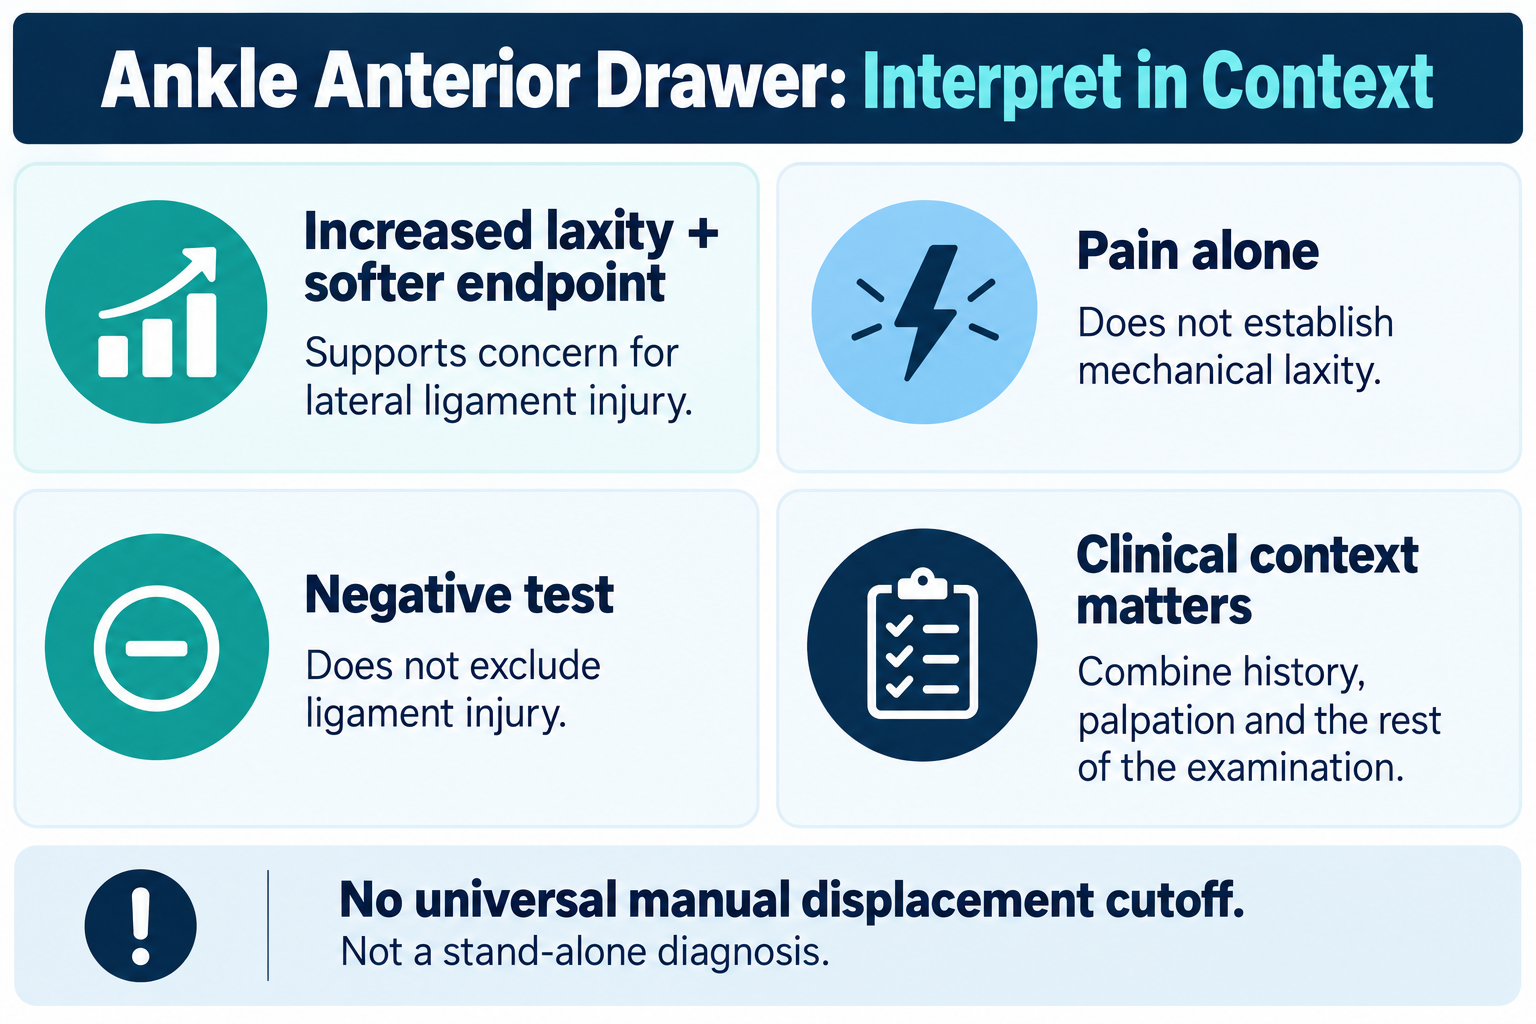
A positive laxity finding is appreciably increased anterior movement, often with a less firm endpoint, interpreted against the opposite side and the clinical presentation.
Pain should be recorded separately: pain alone does not demonstrate increased mechanical laxity.
Do not assign a universal displacement cutoff to a manual examination.
Technique, baseline laxity and the comparison ankle affect interpretation.
A side-to-side comparison also has limitations if both ankles have previous injuries or laxity.
What Do Positive and Negative Results Mean?
A positive finding supports concern for lateral ligament injury or insufficiency, particularly involving the ATFL.
It does not, by itself, establish whether a tear is partial or complete, identify all associated injuries, or determine treatment.
A negative finding means that increased laxity was not demonstrated during that examination.
It does not exclude ligament injury.
Guarding, pain and differences in technique can affect what the examiner detects.
Relevant Anatomy and Associated Conditions
- ATFL: connects the lateral malleolus of the fibula to the talus and is particularly relevant to anterior drawer assessment.
- Talocrural joint: the relationship between the talus and the tibia-fibula mortise is central to the maneuver.
- Other lateral ligaments and capsule: may also be involved in an ankle injury; the drawer cannot map the entire injury pattern.
The test is associated with assessment of lateral ankle sprains and mechanical laxity in patients with recurrent instability symptoms.
It is not a stand-alone test for syndesmotic injury, fracture, tendon injury or cartilage damage.
Diagnostic Accuracy and Evidence Limitations
A systematic review of ankle ligament clinical tests found that anterior drawer testing was more useful for supporting ligament injury when positive than for excluding injury when negative.
The review favored combining drawer findings with ligament palpation.
Its included studies differed in examination methods, positivity thresholds and reference standards.
Consequently, no single sensitivity, specificity or manual displacement threshold should be applied universally.
The review also found uncertainty about using clinical tests to grade the extent of ligament injury and identified limitations in study quality.
Clinical Significance
- Integrate laxity findings with the injury mechanism, tenderness, symptoms and functional examination.
- Document the position, side tested, relative movement, endpoint, pain and guarding.
- Use an inconclusive result as a reason to reconsider examination timing or further assessment, rather than assigning a reassuring negative label.
- Do not use a drawer result alone to clear return to activity or determine the need for surgery.
Common Mistakes and Practical Tips
- Moving the whole leg: stabilize the lower leg before applying the drawer.
- Pulling on the forefoot: support the heel to apply the intended maneuver.
- Changing technique between sides: keep the position and applied force comparable.
- Equating pain with laxity: describe symptom reproduction and mechanical findings separately.
- Forcing through guarding: stop and document why the test is limited.
- Overinterpreting a result: distinguish a supportive examination finding from a complete diagnosis.
Summary
- The Anterior Drawer Test of the Ankle assesses anterior laxity relevant to lateral ligament examination.
- Stabilize the distal tibia and gently translate the supported heel anteriorly with the patient relaxed.
- Interpret increased movement and endpoint quality in context; pain alone is insufficient.
- A positive finding supports concern for ligament injury, while a negative finding does not exclude it.
- Protocol differences and examination limitations prevent a universal manual cutoff or stand-alone diagnosis.
Use the drawer to answer a focused clinical question about laxity, then combine that finding with the patient’s symptoms and the wider ankle examination.